My Account
Not all accidents are foreseeable or preventable, but those that are should be given priority and focus. Premature wear on your equipment will often to lead to accidents because it is wrongly presumed the equipment couldn’t be – or shouldn’t be worn to a level of danger at this point.
A considerable risk is any malfunction that can happen involving compressed air. Blast hoses typically wear out near the coupling. Pressure escapes through cavities formed by an improperly fitted coupling. It’s therefore imperative your couplings are fitted and installed correctly.
Here are 5 Necessary + 1 Optional Steps to ensure the proper and safe installation of your blast coupling.
These steps not only ensure safety for the blaster, but also longevity for your hoses.
Step 1:
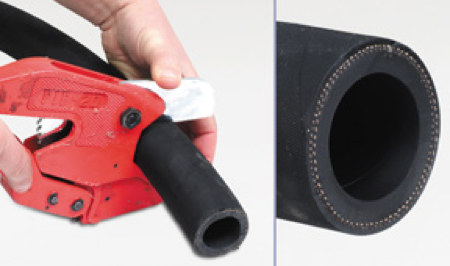
It’s important that the ends of the blast hose are cut clean and squared (flat). Using a tool, such as a KleenCut Hose Cutter Tool will ensure the end is not ragged (like with a hacksaw). Ragged ends or those cut at angles will create gaps whereby the hose will not seal properly against the flange face. These gaps lead to premature leakage and wear.
Step 2 (Optional):
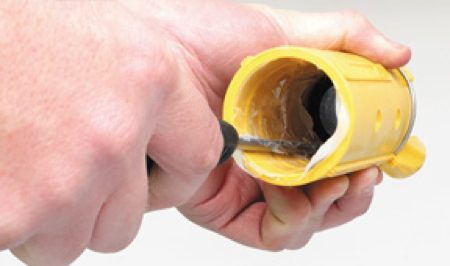
To create an air-tight seal, we advise using a sealant inside the coupling. Do not consider this as an adhesive glue. Its purpose is to seal air gaps, not secure the hose to the coupling. Please note: Before you introduce pressure into the hose (Step 6) make sure this optional sealing compound has properly cured.
Step 3:
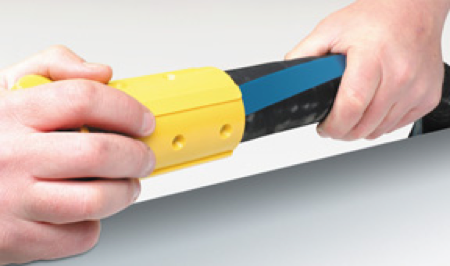
Turn the fitting clockwise, as if screwing it onto the hose until the hose end sets firmly flushed against the coupling flange.
Step 4:
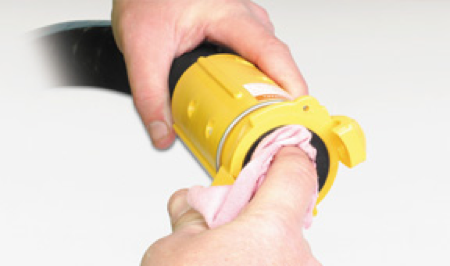
Wipe away any excess sealant from the inside of the hose.
Step 5:
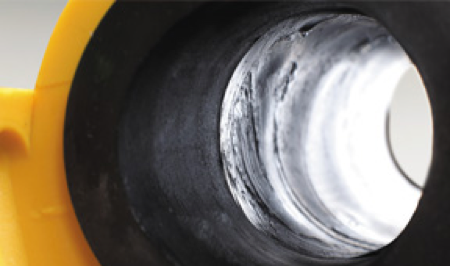
Inspect for gaps between the end of the hose and the coupling’s lip.
Step 6:
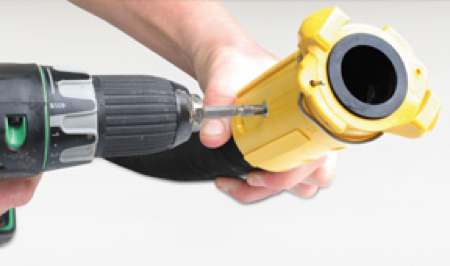
Make sure to always use the proper size fastening screws for each hole. Initially these screws will push the hose away from the from the inner wall of the coupling. Continue to tighten until the hose has been drawn back to the coupling. Do not over tighten and never use screws long enough to pierce through the entire hose into the blast stream. Doing so will offer escape paths for air pressure which will promote premature wear or failure.
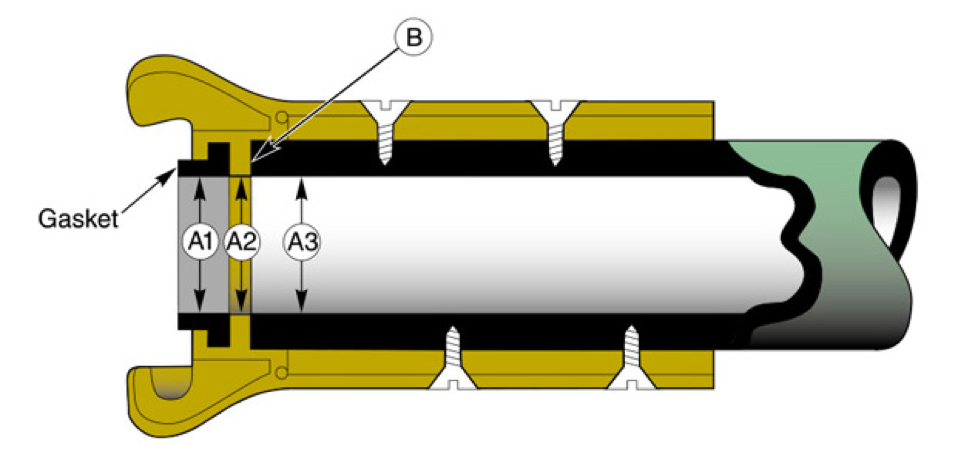 Check that the Blast Hose Bore (A3) is equal to (or smaller than) the Flange Bore (A2) and the Gasket Bore (A1). For hoses with a bore greater than 1 1/4″ (32mm), use Mega Max Large Bore Couplings.
It typically takes a day for the sealant to fully cure, and one should not pressurize the hose beforehand. When safe to pressurize the hose, use the soapy water method to check for air leaks and pressure loss. If leaks are found remove the coupling and refit. Leaking couplings will wear prematurely.
DISCLAIMER: These instructions are provided as a guide only. Neither BlastOne, nor its associated companies, are liable if these instructions are followed and an accidental coupling detachment occurs.