The two main problems that contractors do not want at a job site are accidents, and equipment deteriorating too quickly.
Not too long ago, we had a customer call in with a problem, his blast hoses were wearing out right near the couplings and he needed to know why. If the coupling is not fitted properly, the hose has been known to wear out in that spot because the pressure can escape.
SIX STEPS NEEDED FOR THE CORRECT FITTING OF THE BLAST HOSE TO THE COUPLING.
Superior know how
Correct Fitting of Blast Couplings to Blast Hoses
Step 1:
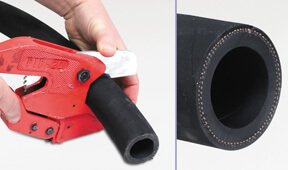
With the KleenCut Hose Cutter Tool, cut the end of the blast hose clean and straight, so that there will be a seal between the end of the hose and the flange face of the coupling (this does not work with a hacksaw). Couplings failing and leakage in the hose can happen if the blast hose doesn’t fit perfectly square against the coupling lip.
Step 2 (OPTIONAL):
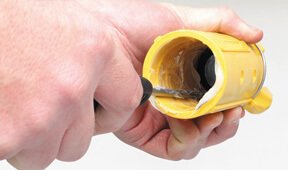
A bead of sealant compound run around the inside of the coupling will act in creating an air-tight seal and make it easier to insert the hose end into the coupling. This is optional as the sealant does NOT act as a “glue”, but it will help to extend the life of the coupling. Note- the sealing compound must be completely cured before the hose is pressurized after the last step.
Step 3:
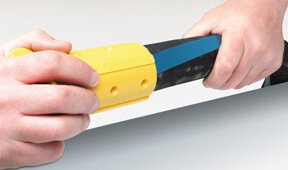
Turn the hose counterclockwise into the fitting until it sits firmly against the flange face in the coupling.
Step 4:
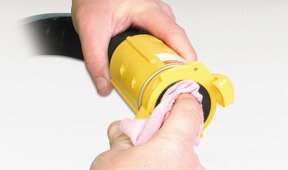
If sealant was used, wipe away any excess sealant that got into the hose.
Step 5:
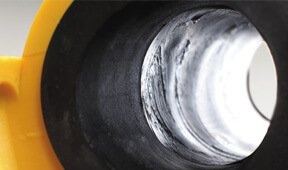
Make complete sure that there are NO gaps between the hose and the lip of the coupling.
Step 6:
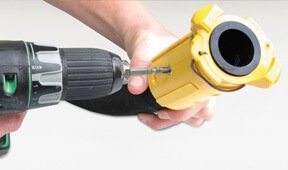
In the available screw holes, use the correct fasteners to hold the hose in the coupling. Initially, while being installed, the screws will push the hose away from the coupling wall but will eventually grab the hose and create a seal against the coupling as it is tightened. The seal must be created but avoid over-tightening the screws. The screws cannot be too long because any that will pierce through the inner layer of the hose will create much faster wear of the coupling.
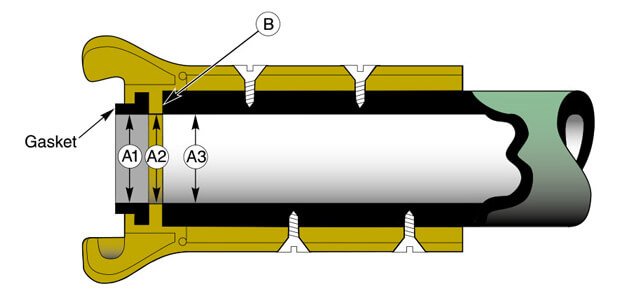
Be sure that the Gasket Bore (A1) and the Flange Bore (A2) are equal or bigger than the Blast Hose Bore (A3). This will give the couplings a longer working time and keep from leaving the gasket unsound and exposed to leaks. Use Mega Max Large Bore Couplings for any hose bore bigger than 1 1/4″ (32mm).
When completed, if step 2 was used, wait until the sealant has completely cured. This is usually 24 hours. Once completed, pressurize the hose and use the soapy water method to find any air leaks. Remove the coupling and refit the hose if, at any time, there is an air leak.
DISCLAIMER: Neither BlastOne, nor its associated companies, are liable if these instructions are followed and an accidental coupling detachment occurs. These instructions are provided as a guide only.
SELECTING HOSE AND COUPLINGS?
BlastOne can assist with selecting the correct size for your project.
 My Account


